With the continuation of crappy winter weather, my ability to resist those hearty, stick-to-your-ribs recipes dwindles. I shared my recipe for Texas Chili not too long ago, and now I’m sharing the icing on the cake (see what I did there?) – the Cinnamon Rolls to round out this meal. I told you in the Texas Chili post about the story behind these cinnamon rolls from my childhood. We all have that, right? A meal or treat or two that holds a special place in our heart because of the memories that come with it. This is one of those for me. Disclaimer: there is nothing even remotely close to whole, healthy, or clean eating about this recipe. Don’t say I didn’t warn you, but since I’m personally only making these amazing, mouth watering, items of pure decadence about once a year, I live with this understanding happily. Although this recipe is not a nutritious one, I still choose to use quality, organic ingredients to avoid unnecessary chemicals and pesticides or genetically modified ingredients.
A secondary disclaimer: these puppies are time consuming, yet so worth it in the end. They require minimal hands-on time, but the total time involved in proofing, shaping, second proofing, baking, etc. will take a few hours from start to finish. Now, I think of this as motivation. Yes, they are a recipe that needs to be done on a day you’ll be home for a decent chunk of the morning or afternoon, but during the proof times I like to see how many tasks I can accomplish in other parts of the home. I’m strange, I realize that, but I take this Cinnamon Roll making marathon into a personal “oh, the dough needs at least an hour before the next step? The bathroom and floors need cleaned, the laundry needs done, and I haven’t dusted all week. CHALLENGE ACCEPTED.” type of opportunity. No matter how you choose to tackle this project, they are a labor of love well worth it.
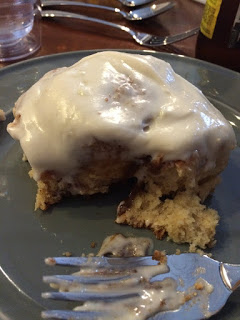
Cinnamon Rolls
Ingredients
Dough:
- 6 T. dry milk powder
- 1/2 c. sugar
- 1.5 tsp. salt
- 3.75 tsp. dry active yeast
- 3.5 to 4 c. all purpose flour
- 1.5 c. warm water (about 110 degrees)
- 6 T. melted butter
- 2 T. melted butter (separate from above)
Filling:
- 3/4 c. brown sugar
- 1 T. cinnamon
- 1/4 c. all purpose flour
- 1/4 c. softened butter
Cream Cheese Frosting:
- 1 block cream cheese room temperature
- 2 c. powdered sugar
- 3-4 T. milk (alternatives like coconut milk also work)
Instructions
-
Mix the first 4 ingredients in a stand mixer with the paddle attachment. Add 2 cups of the flour and the warm water. Turn the mixer on low speed and mix until smooth
2. Add the 6 T. of melted butter and another 1 1/2 cups of flour. Mix to combine. Assess the dough and determine if more flour is needed. Add enough flour so that the dough is still soft, but not sticky.
3. Turn the dough out of the bowl onto a floured work surface. Knead until the dough's surface has become smooth and elastic.
4. Place the 2 T. melted butter into a large bowl (at least 3-4 times the size of the dough). Place the dough in the bowl and turn to coat. Cover the bowl with plastic wrap and leave in a warm place until the dough doubles in size. (Usually takes about 1 to 1.5 hours)
5. While the dough rises, mix the brown sugar, cinnamon and flour for the filling together in a small bowl. Keep separate from the softened butter.
6. Make the icing by placing the cream cheese into the stand mixer bowl with paddle attachment. Mix on low until creamy and smooth. Add the powdered sugar one cup at a time, scraping the bowl between additions to prevent clumps. Add the milk a couple tablespoons at a time to achieve a thick yet spreadable consistency.
7. Once the dough has risen, punch it down to release excess gasses. Using a rolling pin, roll the dough into a rectangle measuring approximately 12" by 18".
8. Generously spread the softened butter over the entire rectangle, then cover evenly with the dry ingredients for the filling that were previously mixed together.
9. Roll from the long edge (so the finished product is an 18" log), roll the dough evenly and carefully to create a uniform sized log. Using a serrated knife, slice the roll into 12 equal pieces, each approximately 1.5" thick.
10. Place the sliced rolls into a greased 9"x13" pan, and lightly brush with more melted (but not hot) butter. Cover the pan with plastic wrap and place back in a warm spot until doubled in size (approximately 1 hour.)
11. Once the rolls have proofed to their full size, bake in a 350 degree oven for 20-25 minutes, or until golden brown. Remove from oven and allow to cool for 5 minutes before spreading with icing and serving.